02 · Grip Size Measurement
Feature 1 of 4. Two entry points lead to the same three-system size output (Yonex L0–L5 / Wilson in fractions / Head–Prince–Babolat equivalent):
- 🤖 AI measurement — snap a palm photo, on-device MediaPipe Hand computes palm length + width + finger count
- 📏 Manual measurement — measure with a ruler, type the number in, goes through the exact same size formula
Both paths share the same sizing formula, so use whichever is more accurate; cross-validate with both if you like.
Two paths at a glance
| 🤖 AI measurement (photo) | 📏 Manual measurement (ruler) | |
|---|---|---|
| Entry | Home → "AI Grip Size" → Start | Home → same card → "Manual Tier Picker" |
| Requires | Rear camera + on-device ML model | Any ruler |
| Time | 30 sec (shoot + adjust + result) | 10 sec (measure + type) |
| Accuracy | RMSE ±4.2 mm ≈ ±⅓ tier | Depends on ruler precision |
| When to use | No ruler / quick first read / want palm + wrist texture | No camera / camera denied / AI keeps failing / want precise control over start point |
Covered in detail below. AI is the default for most users; manual is the fallback + a great ground-truth check for AI.
🤖 AI measurement (photo)
What it does
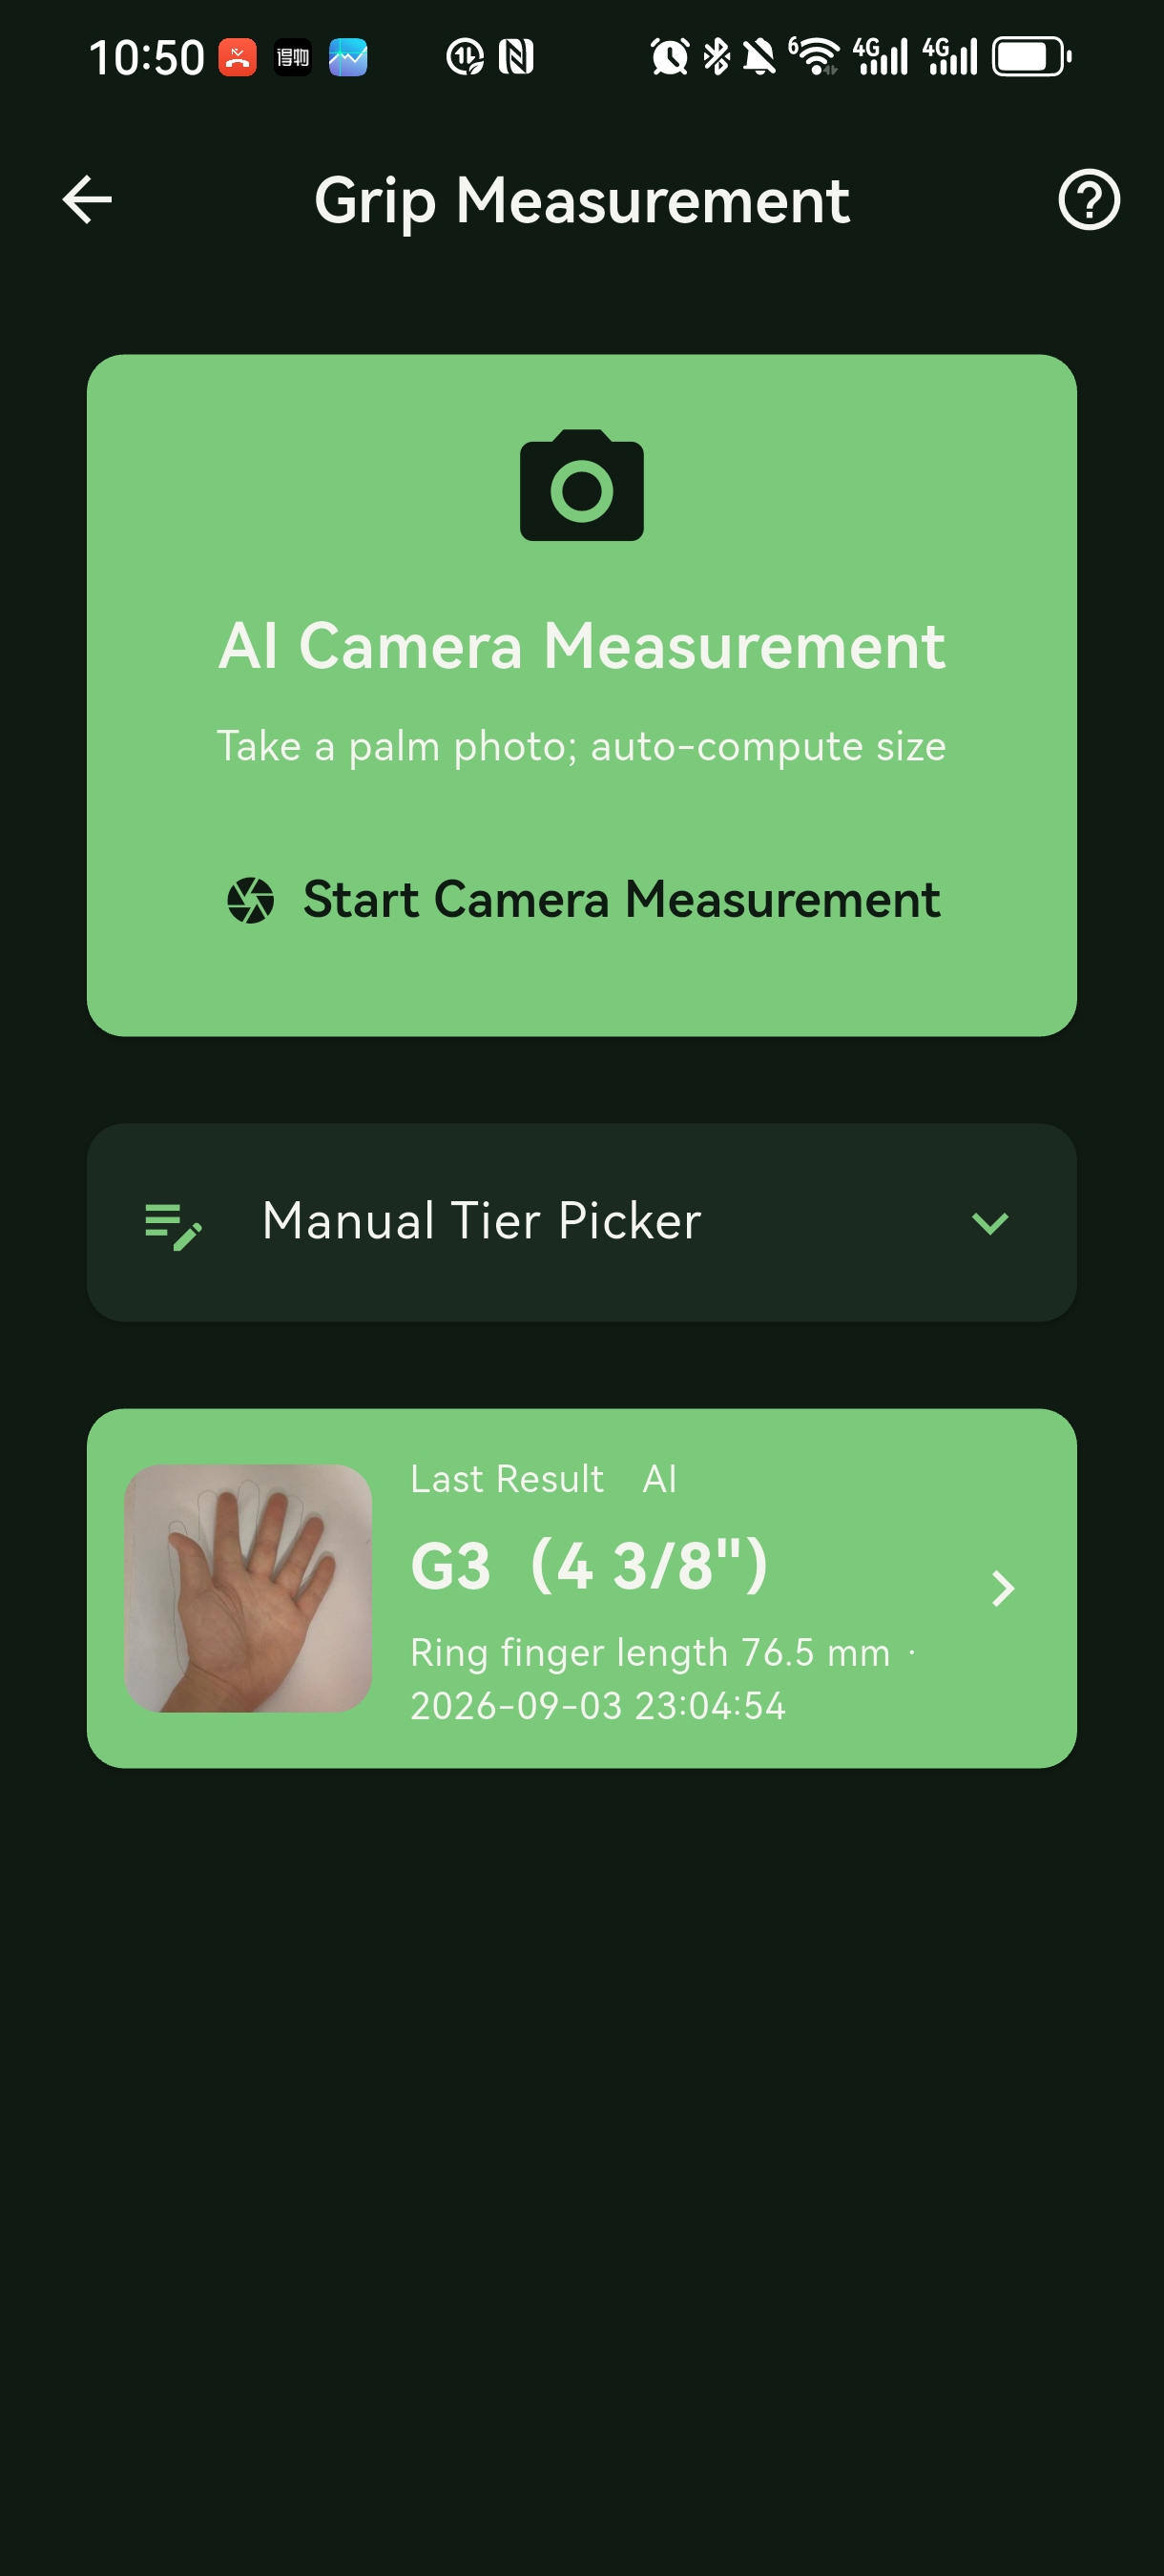
Hold the phone up to your palm. The App estimates the following on-device by default (no upload):
- Palm length (mm)
- Palm width (mm)
- Finger count + ratios (calibration across hand shapes)
- → Recommended grip size in three systems simultaneously
How to shoot accurately
Key 1: place on a flat desk, lay an A4 sheet, palm-up flat with fingers spread
<img src="/images/grip_measurement_1.jpg" alt="Before the shot: palm flat on A4 paper, green frame in place — "Place an A4 paper flat on the desk"" style="max-width: 320px; border-radius: 12px; margin: 12px 0;" />
This is the live preview before shooting: the screen when the phone is directly overhead — preview + pre-computed green frame at 30 cm working distance + bottom hint "Place an A4 paper flat on the desk". Get the A4 fully inside the green frame, palm up with fingers spread, then tap the shutter.
- Desk must be flat — a hard flat surface with a white A4 sheet. Don't hold the palm in mid-air, don't rest on a soft surface.
- Palm flat on the paper, fingers spread — skin-on-paper gives the AI a clear edge to anchor on; the A4 dimensions also back out the camera distance (close to 30 cm).
- Palm facing the camera — the back-of-hand has too little texture, AI will struggle to localize; the palm-side that's on the paper has the richest texture.
- Fingers straight — natural straight + spread, even if you have to push a bit; never curled.
Key 2: even lighting
   ✅ Good              ❌ Bad
┌────────────┐     ┌────────────┐
│  by wall   │     │ cluttered  │
│   🖐       │     │   🖐 + 📦   │
│            │     │            │
└────────────┘ └────────────┘- Light should be even; angled window light is better than overhead (less harsh shadows).
- Turn off flash if there's enough light.
- White A4 paper also "diffuses" overhead hard light — yet another reason to lay it down.
Key 3: shoot straight down
- Not at an angle — straight overhead.
- Camera ≈ 30–50 cm above the paper.
- Use the rear camera (front has heavy distortion).
Capture flow
- Home → "AI Grip Size"
- "Start" → camera permission prompt (first time)
- Shoot straight down (≈ 30–50 cm), frame on the flat palm, hold still for 1 sec while pose pre-check runs
- Shutter (or auto-trigger)
- Wait 1–2 sec: on-device MediaPipe Hand runs → result page
Result page
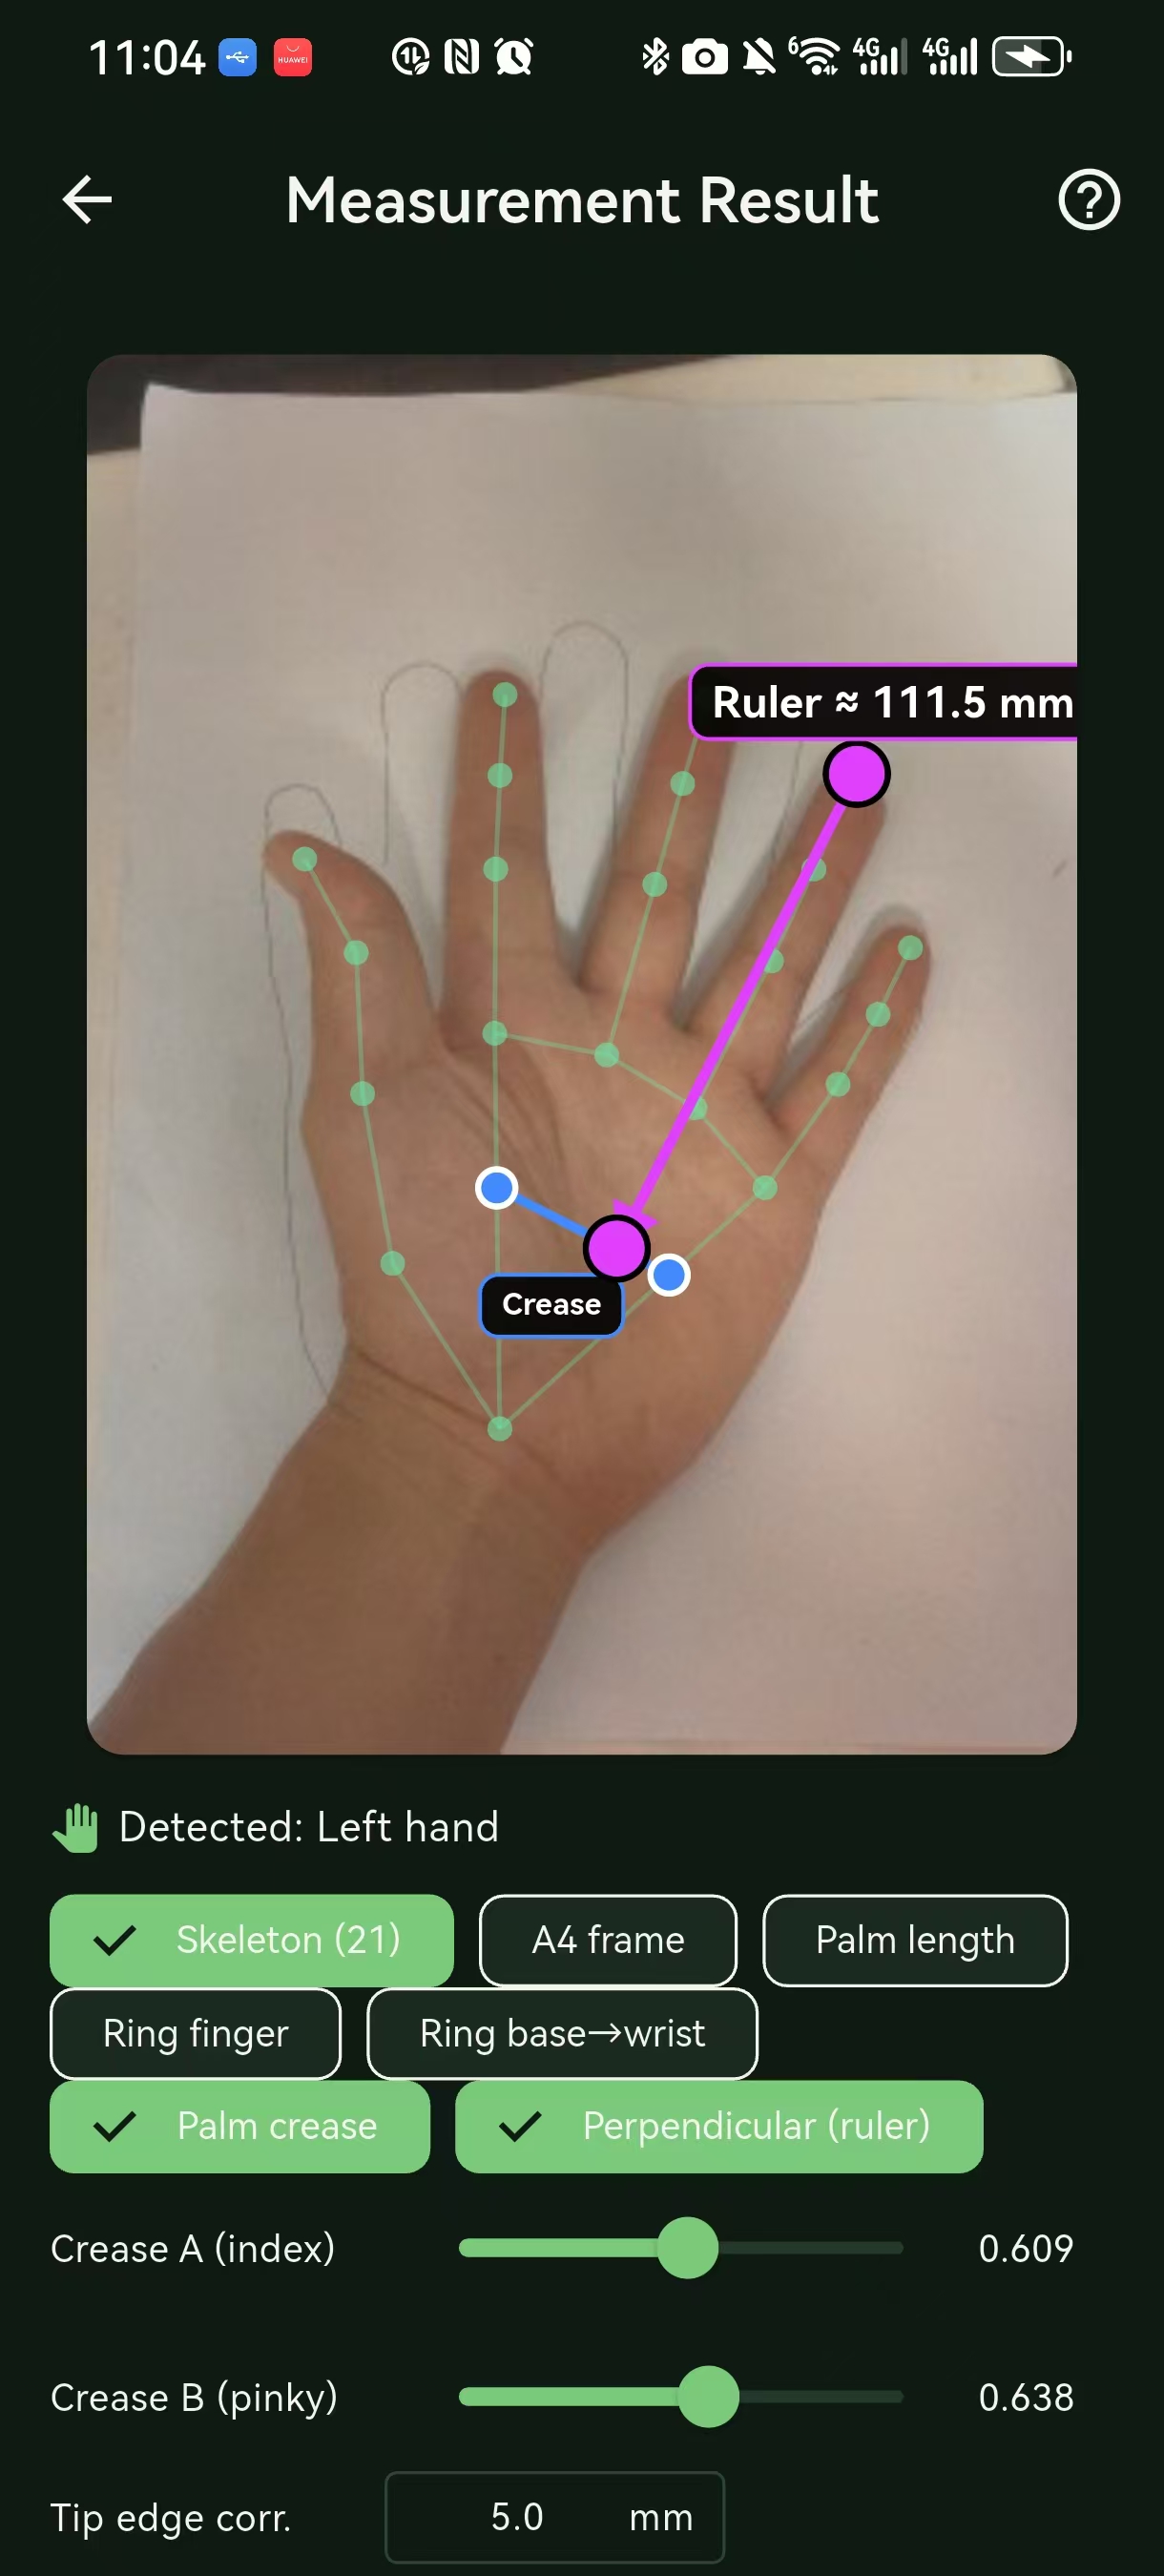
The result page shows the recognition result overlaid on your photo:
| Panel | Content |
|---|---|
| Photo + overlay | Your palm + AI-drawn transverse line (the boundary between palm and wrist) |
| Measurements | Palm length + palm width (mm) |
| Recommendations | Yonex / Wilson / Head–Prince–Babolat simultaneously |
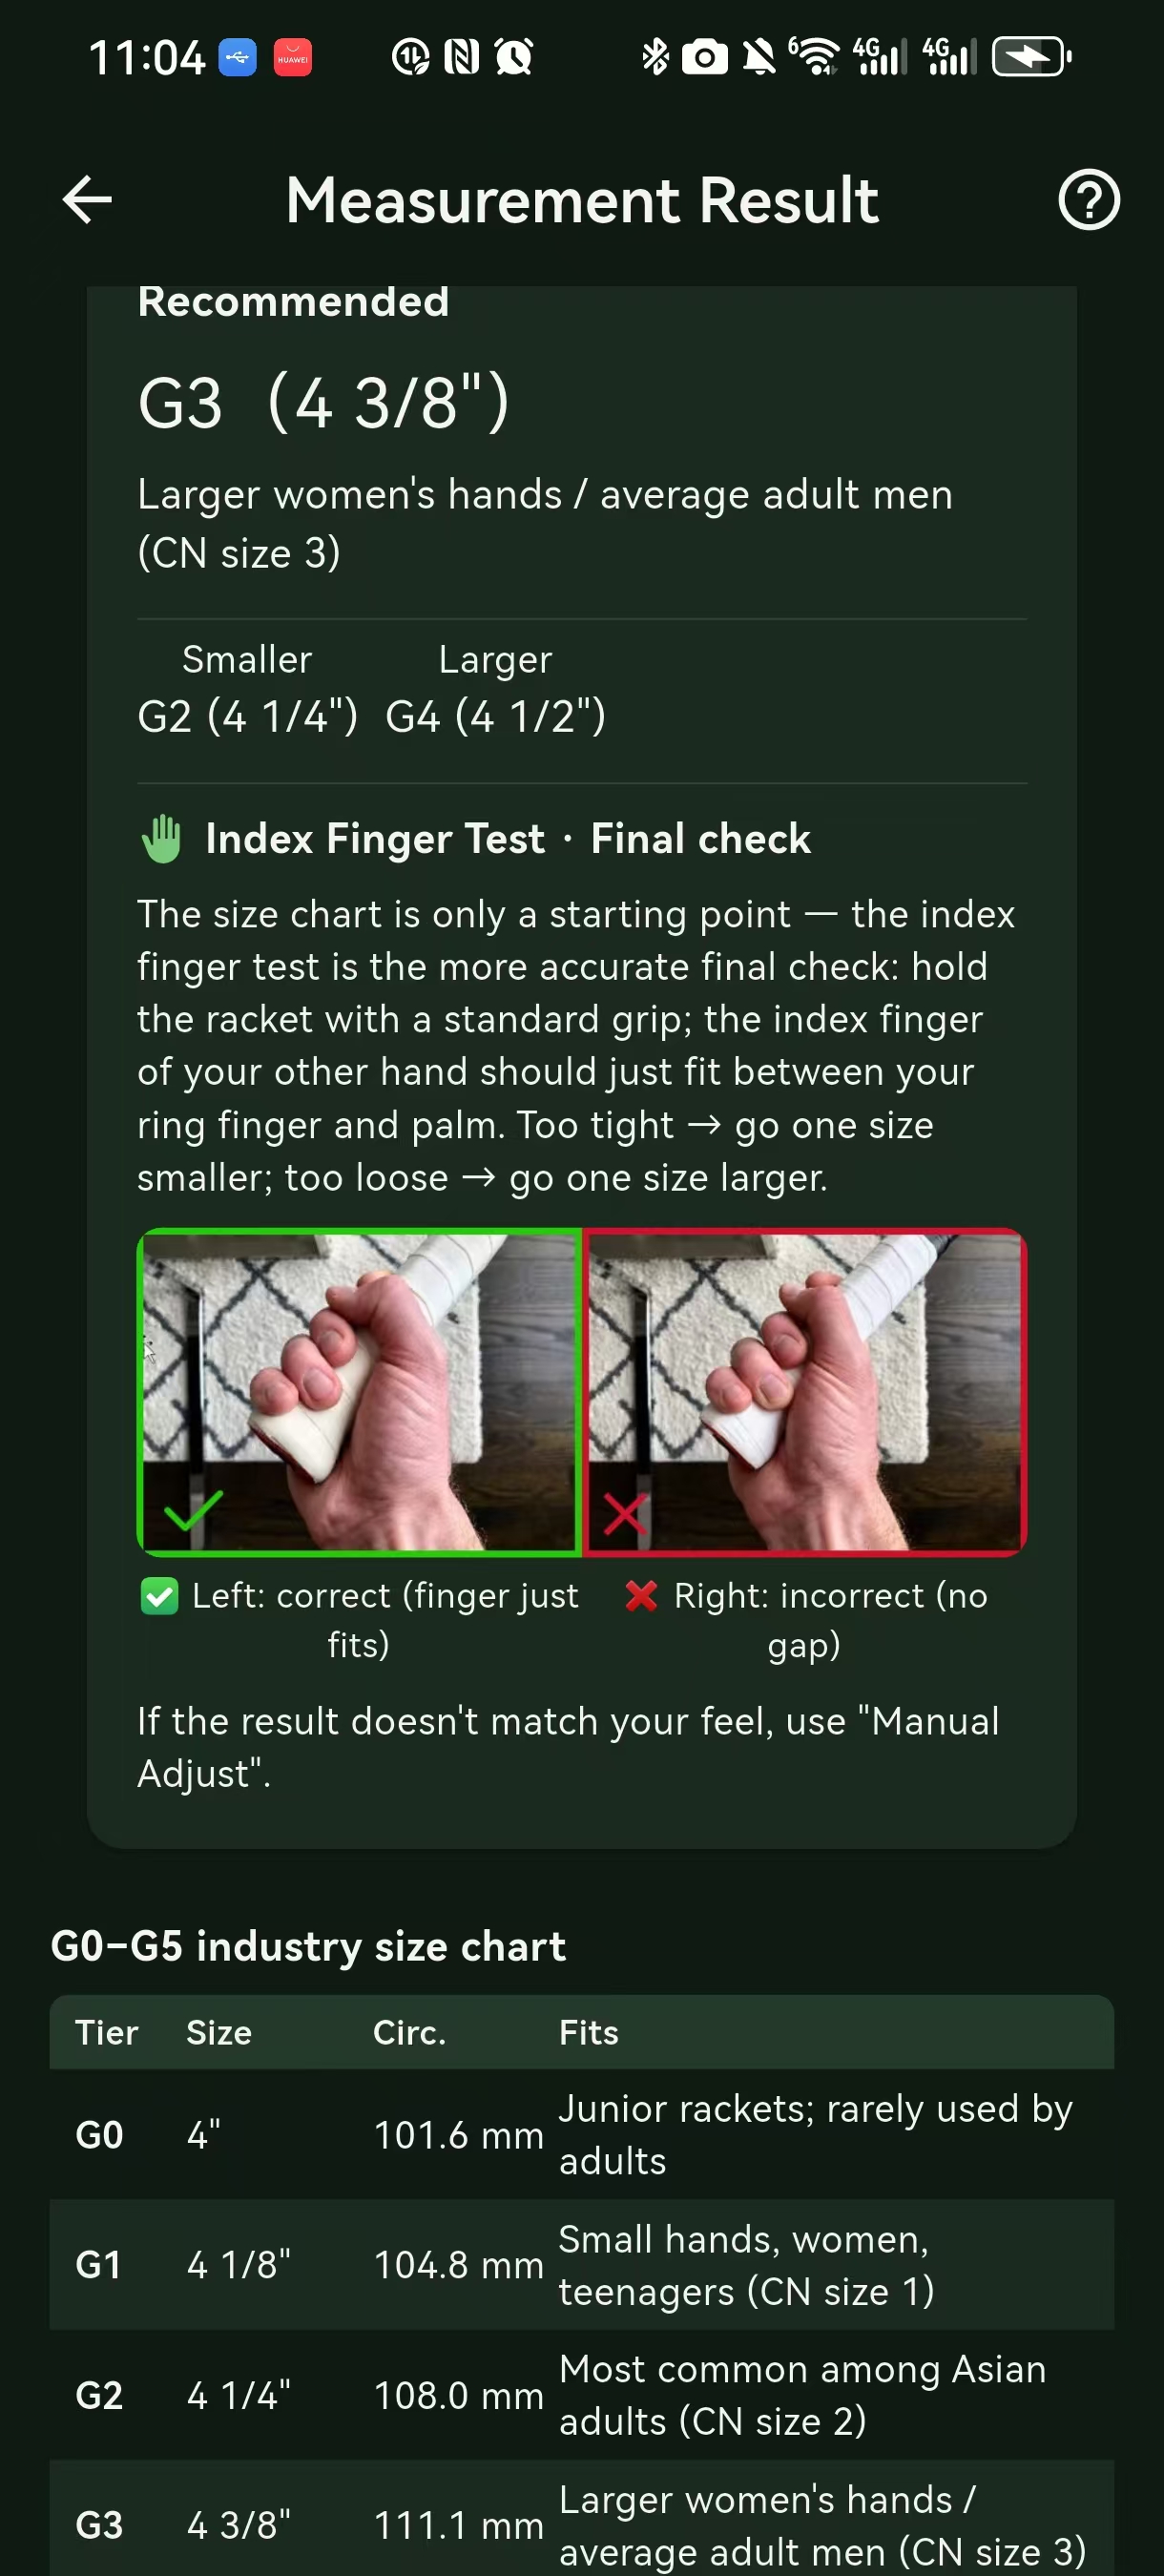
Three-system grid example:
             Yonex   Wilson    Head / Prince / Babolat
             L3      4½"       4¾
Two correction paths for the AI result
Before we dive into the result page details, here are the two correction modes the App provides — pick whichever fits the situation.
Mode 1 — drag the transverse line on the result page (preferred)
This mode lets you drag the transverse line on the photo. The line is the AI's "palm start position" — if it's 5 mm too high (toward the fingertips), the recommended size jumps one tier.
- After the shot, you'll see an AI-drawn wrist transverse line on the photo
- Long-press, then drag up/down to move it
- The "Measurements" + "Recommendations" panels update in real time
- Drag range is clamped to ±15 mm from the AI's initial position (to avoid absurd values)
- Tap "Save to history" when satisfied
Use this mode when "AI number is roughly right, just a bit off (typically 3–10 mm)".
Mode 2 — Adjust Green Frame page: fit the A4 sheet to the green frame
If the overall scale is wrong — e.g., you wore multiple overgrips and the image looks elongated/compressed — switch to the Adjust page to give the App a known physical reference.
The page title is "Adjust Green Frame", showing:
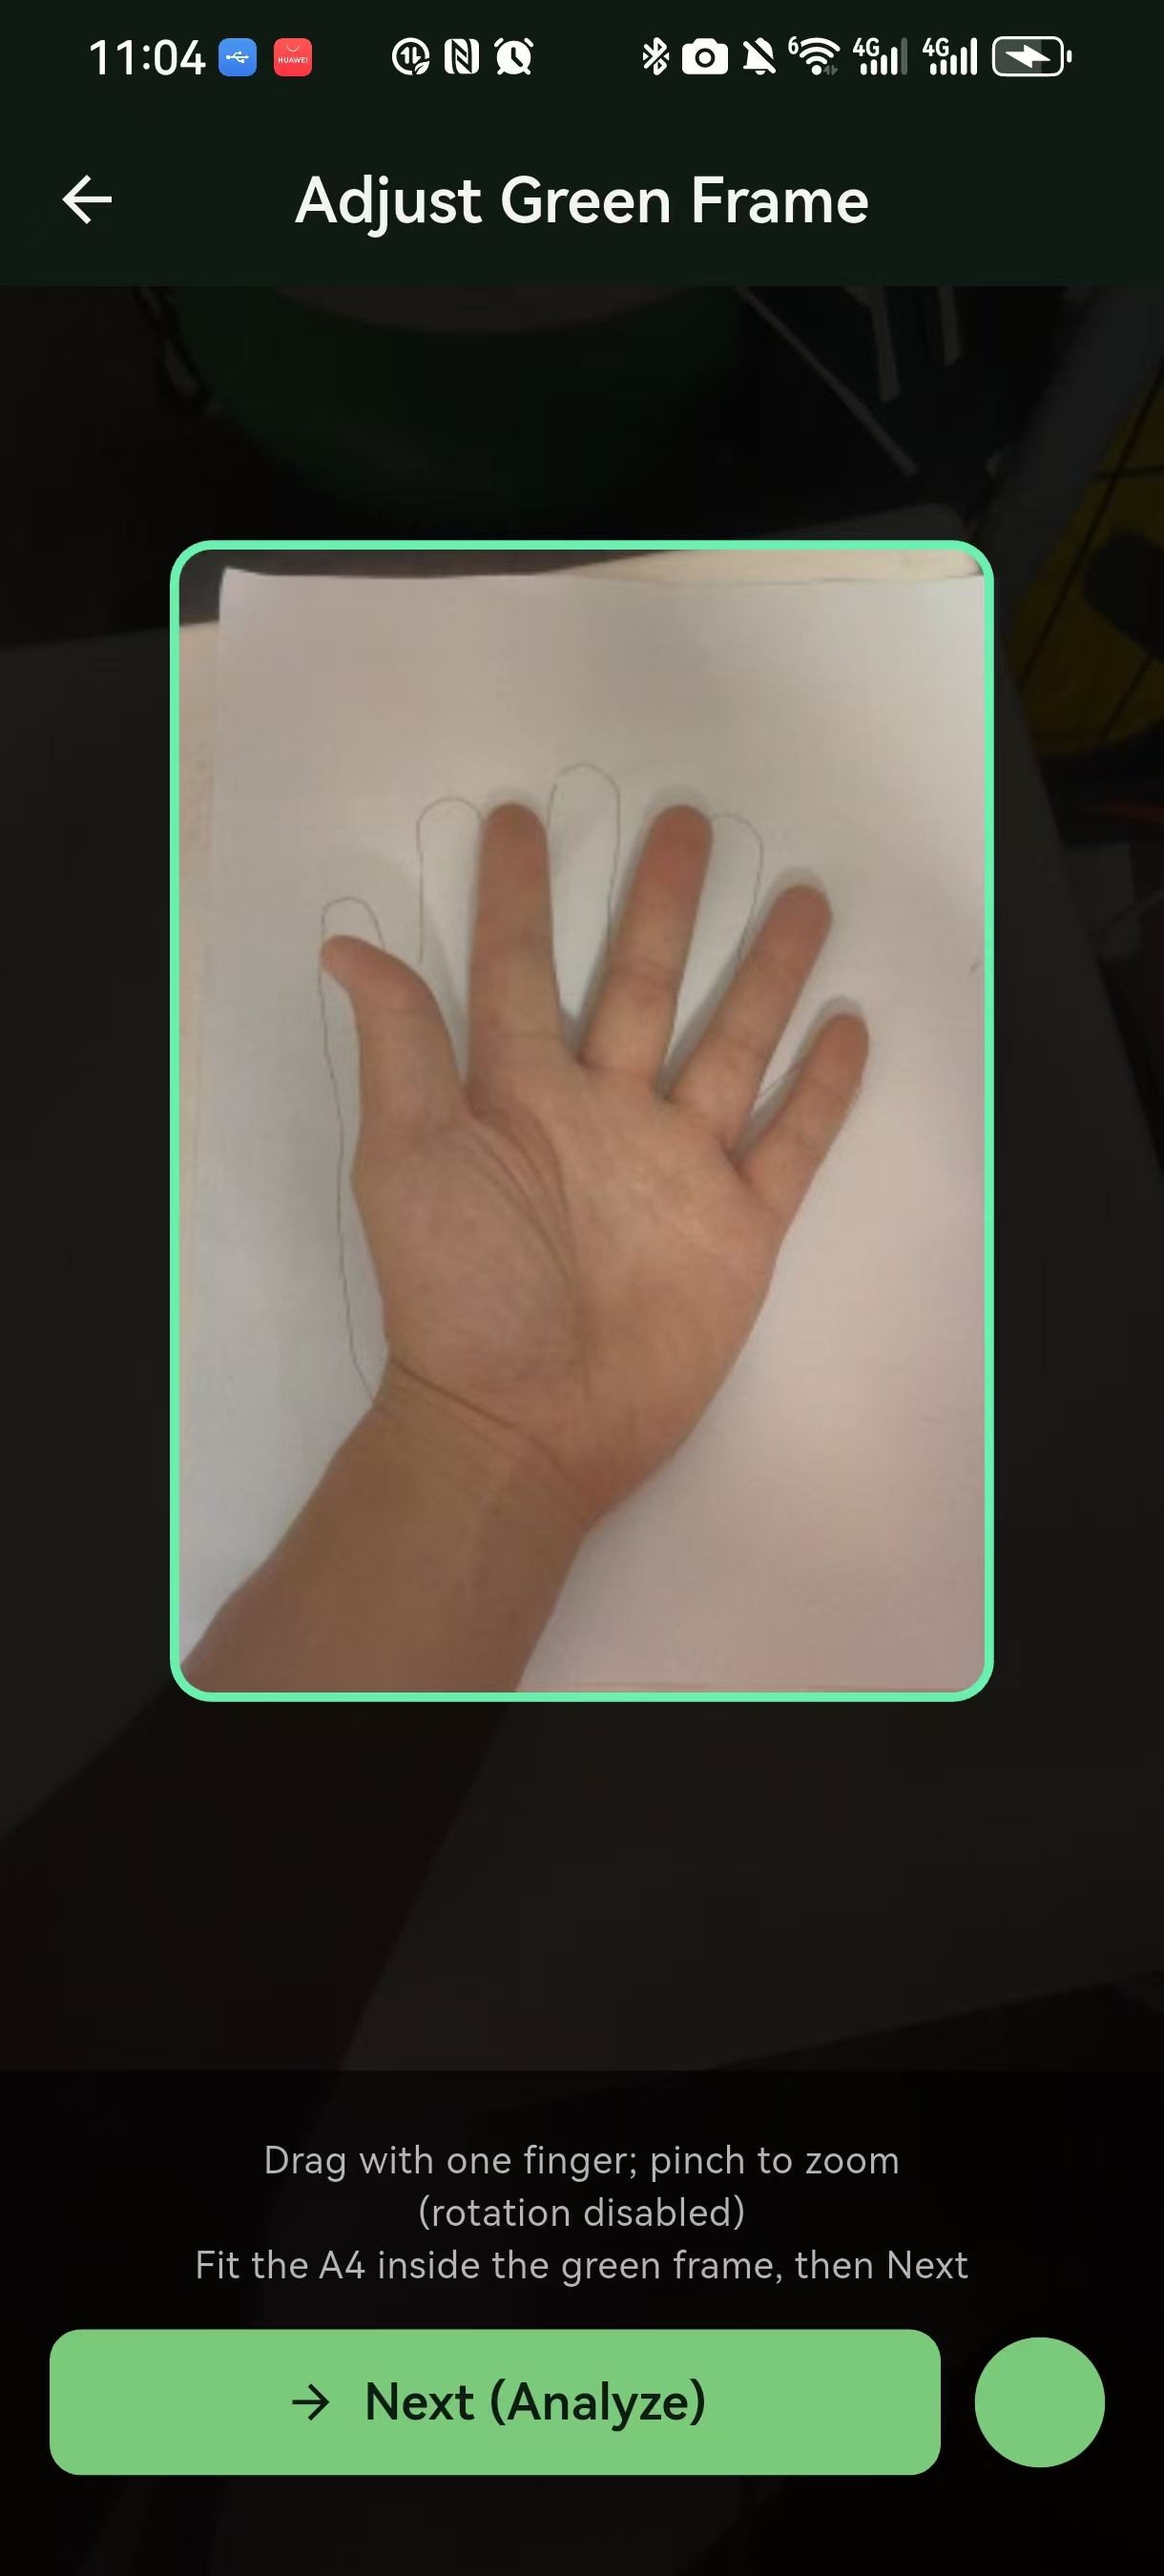
- The full shot (palm + A4)
- A cyan-green rectangle the App computed for a 30 cm standard working distance
- A bottom hint: "Drag with one finger; pinch to zoom (rotation disabled). Fit the A4 inside the green frame, then Next."
- A green Next (Analyze) button
How to operate:
- One finger drag — pan the photo so the A4 sheet is centered in the green frame
- Two-finger pinch / spread — zoom the photo so all four edges of the A4 sheet hug the green frame
- Stop when the four paper edges overlap the green frame — the tighter, the more accurate
- Rotation is disabled (so you don't accidentally rotate the photo)
- When satisfied, tap Next (Analyze) — the App re-runs palm-length detection at the corrected scale
An A4 sheet is 210 × 297 mm; telling the App "this green frame = an A4 at this working distance" nails down absolute scale — something Mode 1 alone can't do.
Combine the two modes: Mode 2 fixes scale, Mode 1 fixes palm start.
Error budget and mitigations
| Source | Impact | Mitigation |
|---|---|---|
| Palm tilted | Length ±5–8 mm | App says "place flat" |
| Focal distortion (front cam) | Length ±3 mm | Default forces rear cam |
| Skin tone / lighting | Keypoint shift ±2 mm | MediaPipe Hand 2024 model is robust across tones |
| Partial occlusion (ring, long nails) | Failure / oversized | Remove rings, trim nails first |
| Hand-shape training bias | ±3 mm | Use Mode 1 (drag line) or Mode 2 (adjust page) |
Measured RMSE: 4.2 mm on-device. In tier terms: about ±⅓ tier in the Yonex system.
Limits and edges
- ❌ Gloves not supported — gloves drop keypoints
- ❌ Children's hands — training set is mostly adults; kids won't be accurate
- ❌ Extreme lighting (very dark, strong backlight) — shot fails → use Adjust page, or 📏 manual measurement
- ❌ Multiple hands in frame — App auto-picks the largest (often wrong)
No original photo saved
V1.1 does not save the original photo. After measurement, only the keypoint coordinate array (~80 bytes) is cached for history replay; the photo is discarded immediately. If you need to keep a copy, go to Settings → Data management → Enable original photo archive (off by default).
📏 Manual measurement (ruler)
This path uses the exact same size formula as the AI path — only the entry differs. So if your ruler reading is accurate, the result will match what AI computes; if AI was off, manual measurement is a great ground-truth check.
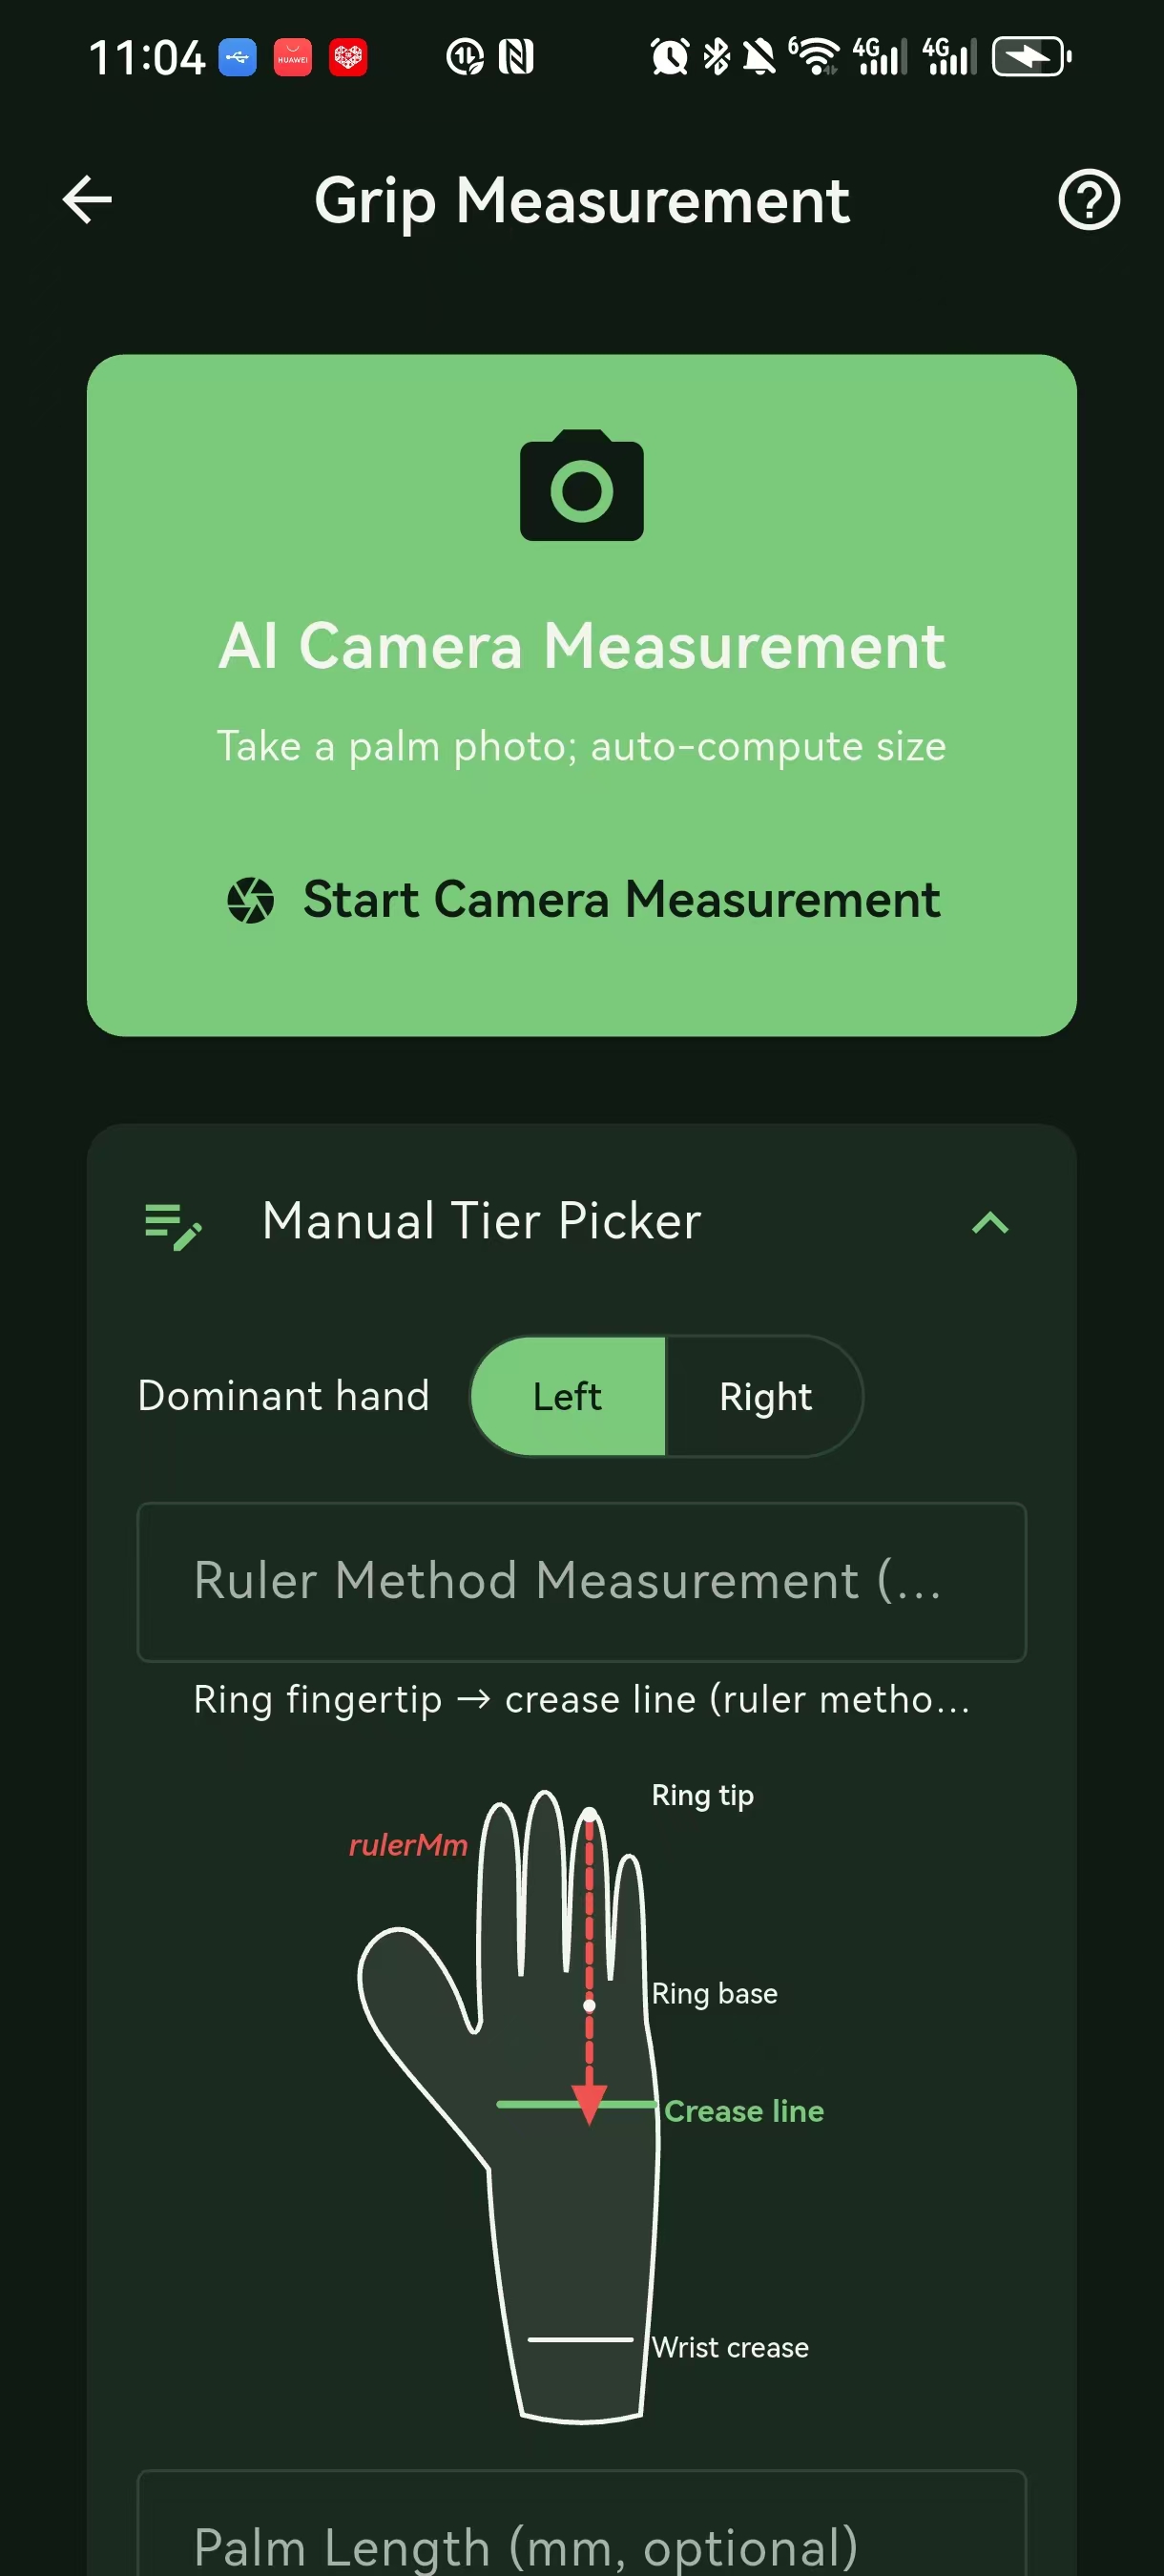
Entry
Home → "AI Grip Size" card → "Manual Tier Picker" link below.
Steps
- Pick your dominant hand (left / right) — the diagram on the page flips accordingly
- Measure with a ruler: from directly below the ring fingertip down to the transverse line (the second crease counting up from the wrist crease — the palm / finger boundary)
- That distance is your rulerMm — the "palm length" used in the sizing formula
- Type it into the Ruler Method Measurement input (mm); you can leave it blank and pick a tier directly
- Optional: fill in Palm Length (mm, optional) if you measured from the wrist crease to the ring fingertip instead of the transverse line to the ring fingertip
- The App applies the exact same formula as AI camera mode and outputs Yonex / Wilson / Head–Prince–Babolat
When to use
- Camera permission denied / no camera
- Repeated AI failure (extreme lighting, gloves, very small hands)
- You already have a ruler reading and just want to type it in
- You want a sanity check against the AI result
How to measure well
- A soft tape measure or rigid ruler + caliper both work; mm precision is enough (output is ⅛" tiers)
- Ring finger is the standard sizing finger (index and middle are longer, which cross-system comparisons won't agree on)
- Transverse line: the boundary between palm and fingers. Curl your hand, then release — you'll see 3 creases: wrist, palm-mid, finger-base. Take the middle one
- Measure with the hand naturally relaxed — don't force it open (that adds 1–3 mm)
FAQ
iPhone / iPad?
Not supported in this version. See 00 · Supported platforms.
How powerful does the device need to be for on-device detection?
Snapdragon 7xx / Dimensity 800 or higher recommended. Low-end devices may feel "spinning" for a few seconds.
Does the data get uploaded?
No. All computation runs on-device; the photo never leaves your phone.
Will AI and manual produce the same size?
In theory, yes — both paths share the same formula; in practice, expect ~⅓ tier difference (sources: AI measurement error ±4.2 mm + ruler reading error). If the two paths differ by ≥ 1 tier, run each twice and take the median, or treat 📏 manual's rulerMm as ground truth.
I don't agree with the AI result — what are my options?
From highest precision to lowest:
- Drag the transverse line on the result page — long-press its handle and drag; the measurement + recommendation panels update in real time. Use this when AI is roughly right but a bit off (typically 3–10 mm).
- Adjust page — on the result page tap "Adjust scale only" → a ±10 mm slider. Use this when you've already measured with a ruler and just want to type the number in, or when on-device detection fails entirely and you can't see the photo.
- Skip AI entirely → 📏 Manual measurement — the fallback path; completely independent of AI.